Running Magento
appserver.io is a pretty cool and sophisticated infrastructure fully built upon the PHP stack. This makes it truly easy to develop and extend the platform. appserver.io comes with a built in webserver module that provides Fast-CGI support. Therefore it is possible to run and install any PHP application. The following tutorial guides you through the Magento installation process necessary to run on appserver.io.
Prerequisite: Up and running installation of MySQL
You will need a running installation of appserver.io (>= Version 1.0.0-rc3). If you are new to this project you can easily download and follow the installation guide for your specific OS.
After the setup has finished the appserver.io is up and running and you can call the welcome page with
By default, appserver.io is configured to run on port 9080 in order to not to affect any existing webserver installations.
You can easily change that in the /opt/appserver/etc/appserver.xml just by going to section
<server name="http"
    ...
and change the port within that section for example to 80. After that restart the appserver.io which can be done with the following command.
sudo /opt/appserver/sbin/appserverctl restartOf course there is no need to change the port if you only want to check out the capabilities of appserver.io
Installation
To start, you have to download the latest Magento CE version from the Magento website.
To install Magento, we have now two options. The easiest way is to install Magento without creating a vhost. Therefore you just extract the Magento source into the document root under /opt/appserver/webapps by opening a commandline and type
$ cd /opt/appserver/webapps
$ tar xvfz magento-community-1.9.1.0.tar.gz
This will create a folder magento and extracts the Magento source files to it. Before you are able to step through the installation you MUST correct the rights of the magento folder to ensure Magento is able to write the configuration files.
sudo chown -R _www:staff magento
sudo chmod -R 775 magento
In addition, Magento requires an existing MySQL database and a user that has access to the database. To create the database and the user, use the MySQL command line utilities. To log in to the MySQL command line utilities, type
$ mysql -uroot -pAfter successful login, create the database, the user and the password with
mysql> create database magento;
mysql> grant all on magento.* to "magento"@"localhost" identified by "magento";
mysql> flush privileges;
Optional you can use another database administration tool like phpMyAdmin to create the database. Of course you can also install phpMyAdmin on appserver.io.
Now, as you are prepared to step through the Magento installer, start your favorite browser and open
http://127.0.0.1:9080/magento.
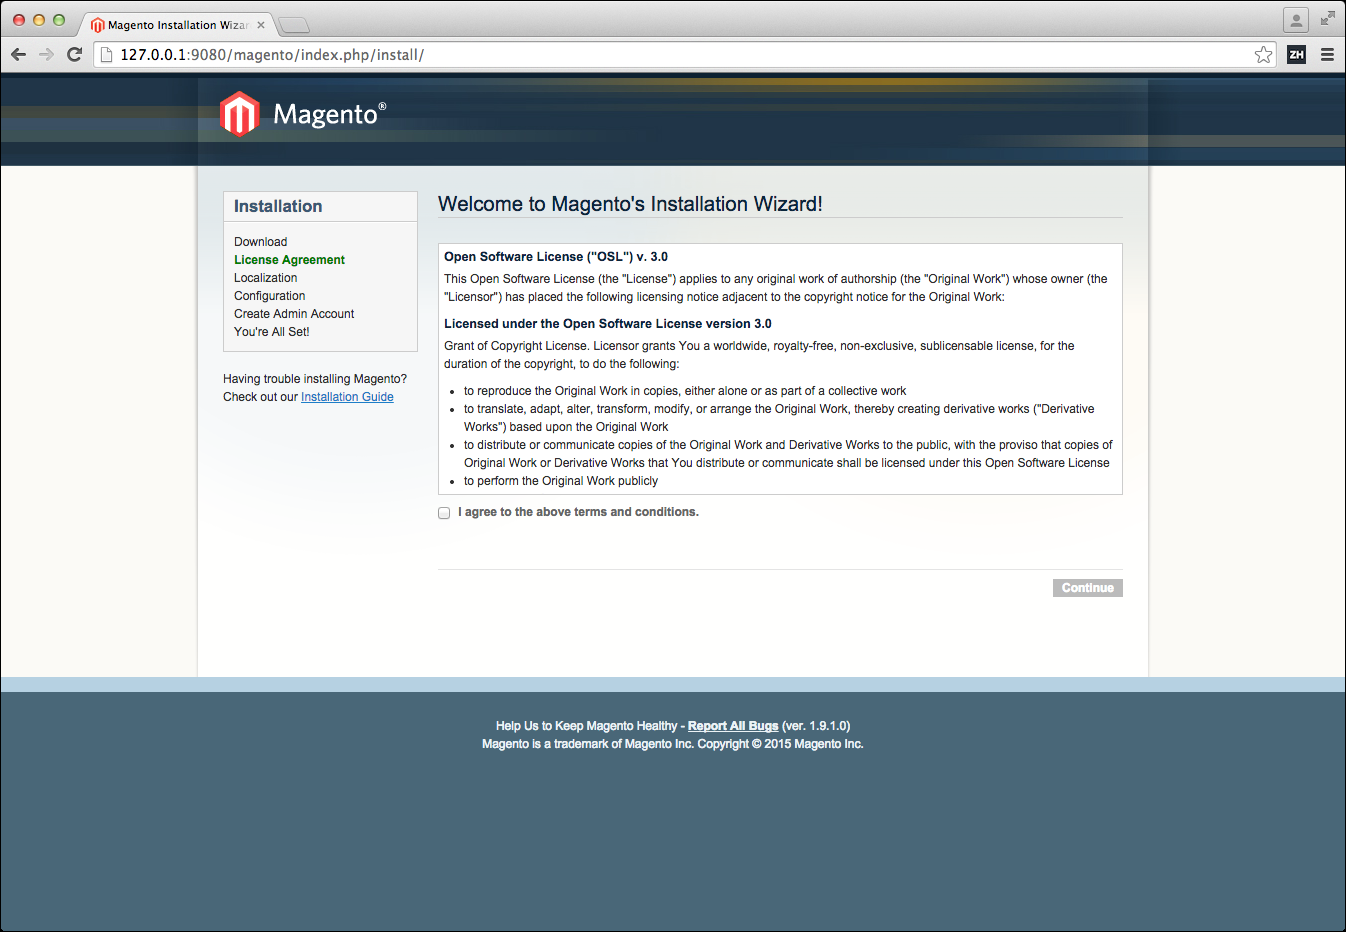
The first step of the Magento installation wizard contains the OSL license and a checkbox that allows to agree to the Magento Terms and Conditions. By activating the checkbox, you agree to the Magento terms and conditions and are able to proceed to step 2 by clicking on the button Continue.
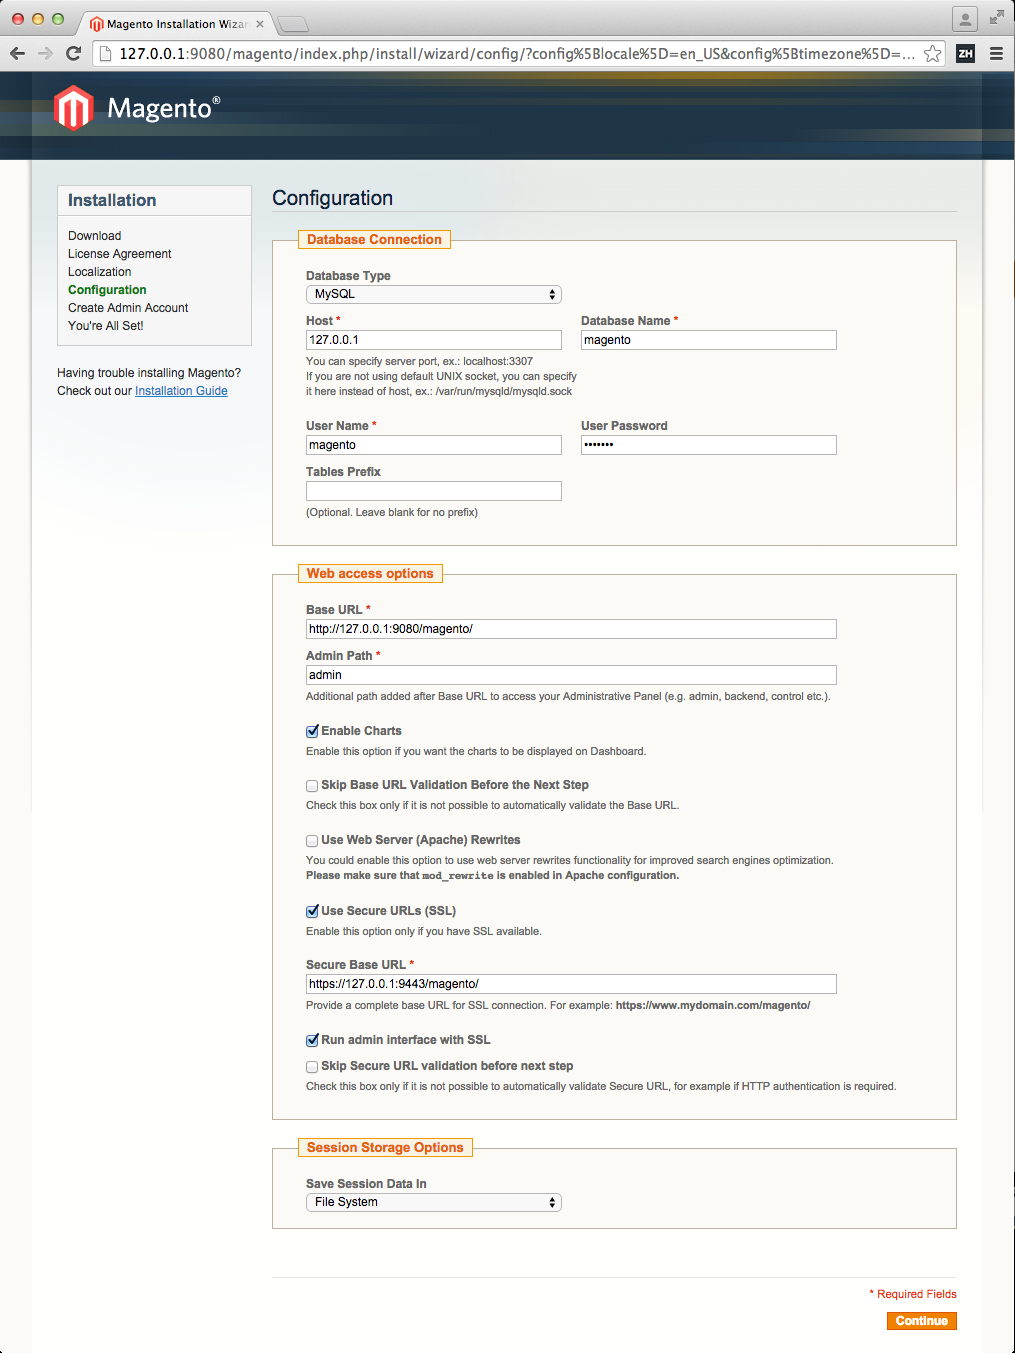
The first fieldset Database Connection requires the database configuration. As you have created a database and the necessary user credentials before, you have to enter these values here.
The second fieldset Web access options allows, beside the standard options, to activate SSL to use secure URLs for the admin interface. As appserver.io generates a default wildcard SSL certificate on startup, you can activate the Use Secure URLs (SSL) checkbox.
After activation, another field and a checkbox will appear. As the default port for SSL connections on appserver.io is, by default, NOT 443, you've to correct the preset URL to https://127.0.0.1:9443/magento/. Then activate the checkbox Run admin interface with SSL. All other options are good with their default values.
Generation of a self-signed
SSLcertificate can be tricky in some cases.appserver.iogenerates a self-signedSSLwildcard certificate during startup, without additional effort! You can find the generated certificate in the configuration directory under/opt/appserver/etc/appserver/server.pem. If you'll delete it, it'll be re-created with the next startup.
Proceed to step 3 by clicking on the button Continue.
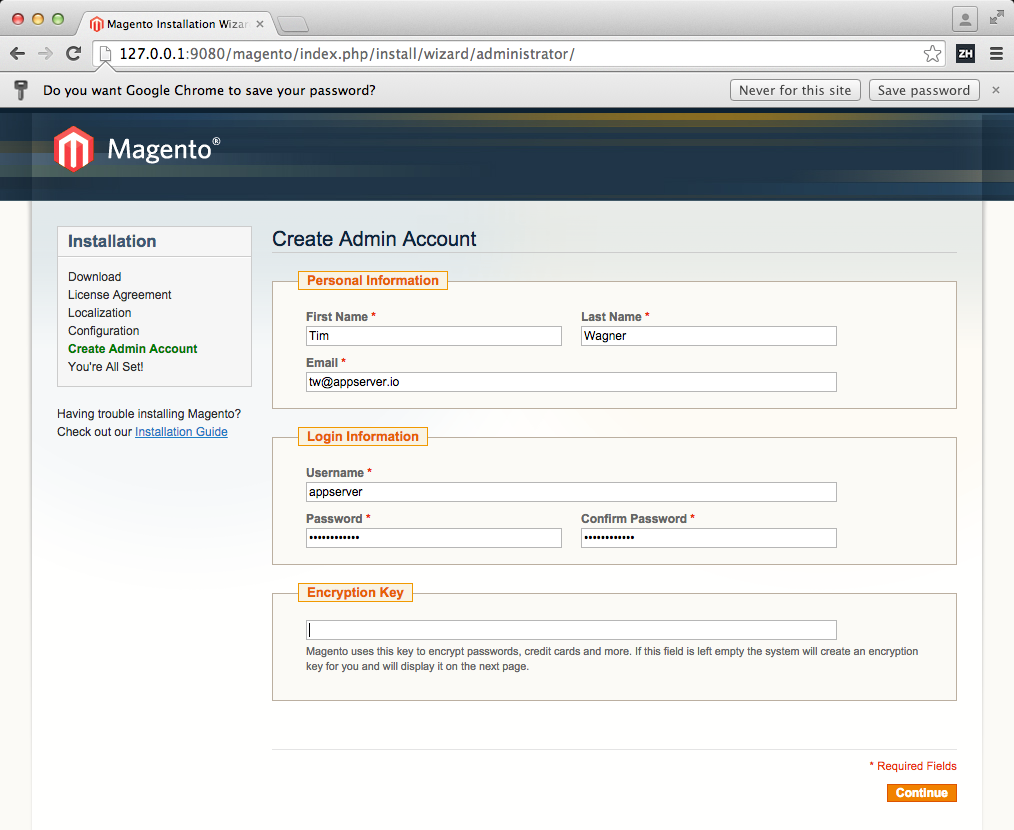
The final step of the installation wizard allows to create an admin account. This is necessary to login to the admin panel. Enter your personal data and the user credentials here. The Encryption Key is optional, so you do not have to enter any data here.
Finish the installation wizard by clicking on the button Continue.
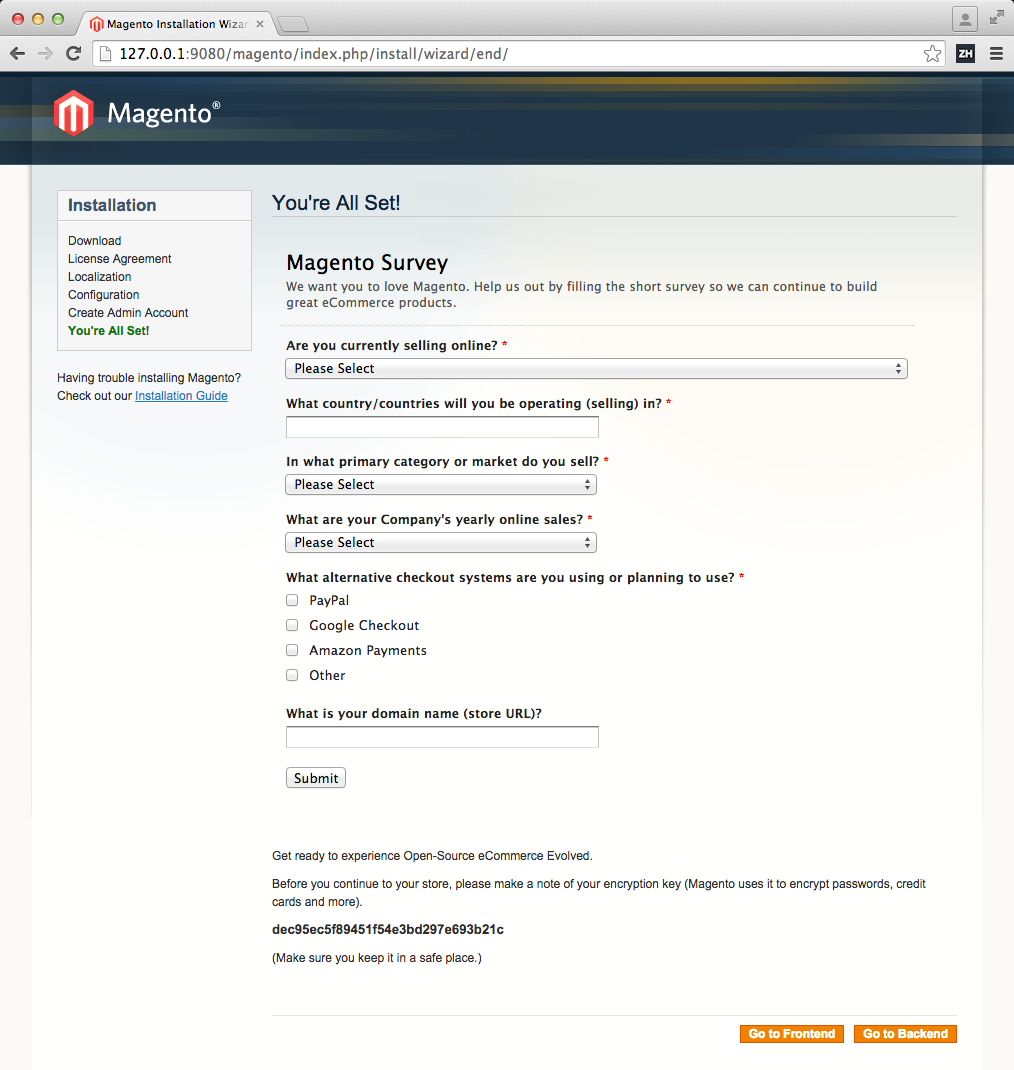
Congratulations, you have successfully installed Magento on your local
appserver.ioinfrastructure!
Securing your Installation
In contrast to an installation on the Apache webserver, appserver.io actually can not parse .htaccess files. So it is necessary to secure your installation manually by adding the apropriate directives to the appserver.xml configuration file.
So, after the installation process, described above, the next step is to login to the admin panel. To do this, open http://127.0.0.1:9080/magento/index.php/admin
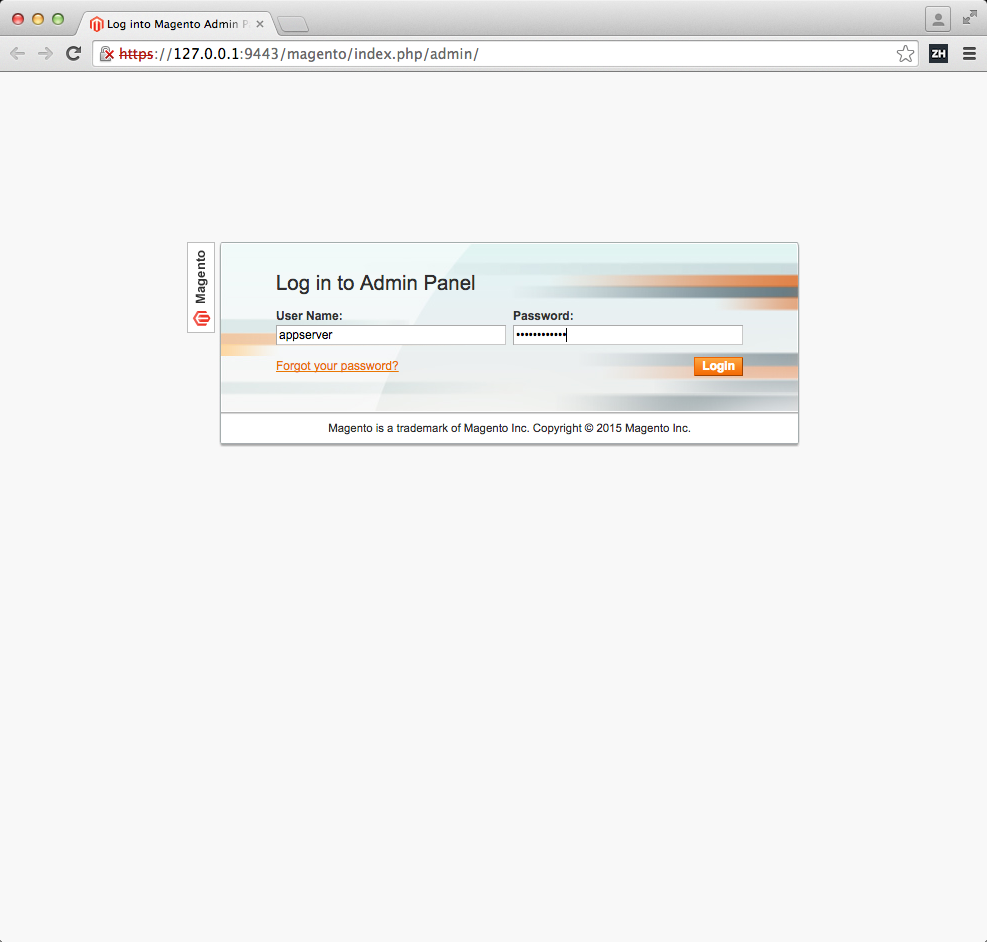
and login with the user credentials that you created before. Delete the unread messages and update the Indexers. There will be one message left below the top navigation.
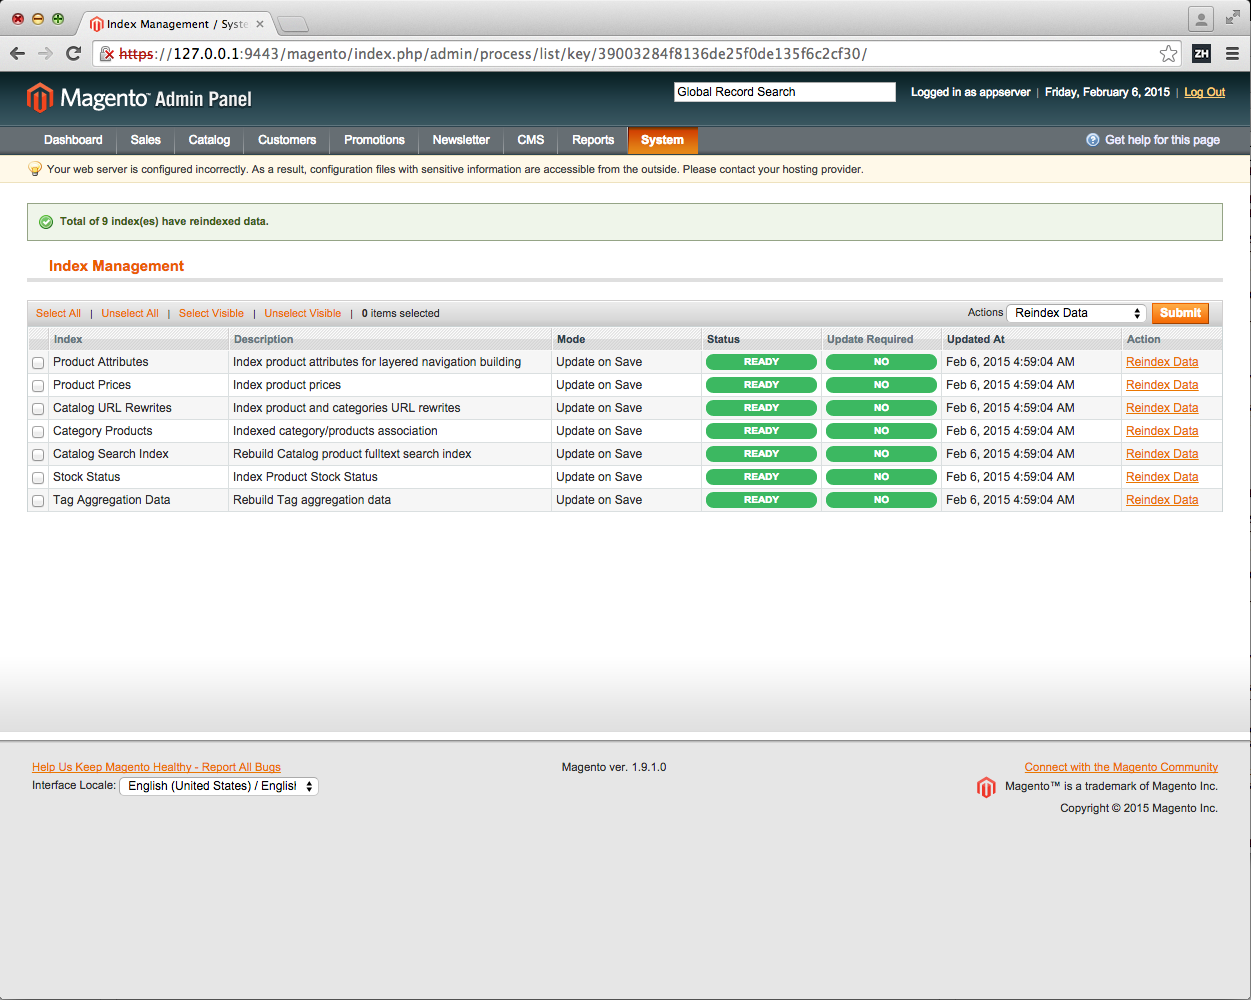
This message is a result of a Magento internal security check that tries to open the previously generated /opt/appserver/webapps/magento/app/etc/config.xml by simulating a browser. Try it by yourself! Start your favorite browser and open http://127.0.0.1:9080/magento/app/etc/config.xml. You should see a page very similar to this
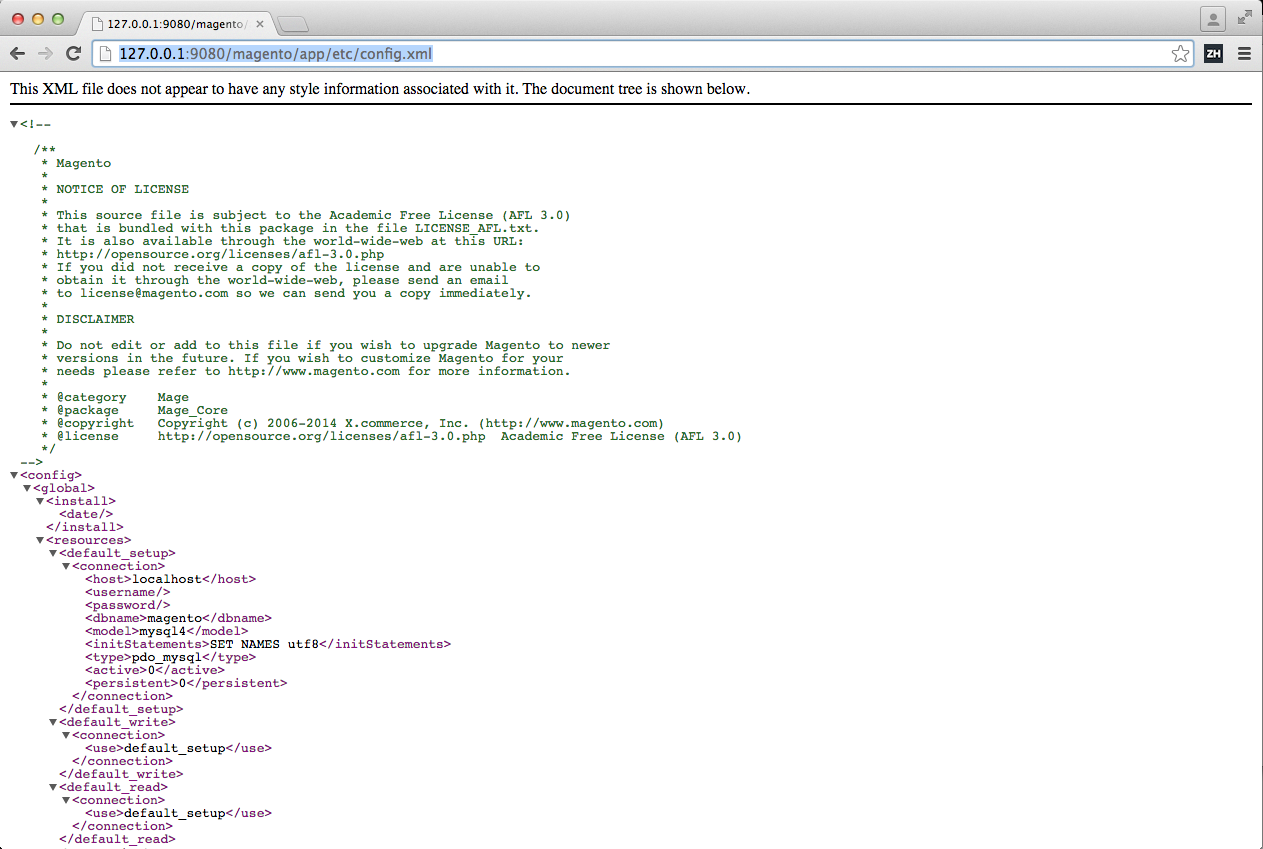
This means, depending on your appserver.io configuration, your Magento configuration, including DB username and password, is visible to everyone that can access your IP. To solve this is pretty simple!
Open /opt/appserver/etc/appserver/appserver.xml file with the editor of your choice (you need admin access to edit this file).
First comment out the <access type="allow">...</access>, but explicitly allow Magento index.php, media, skin and js by adding the following lines to the <accesses> node.
<access type="allow">
    <params>
        <param name="X_REQUEST_URI" type="string">
            ^\/magento\/([^\/]+\/)?(media|skin|js|index\.php).*
        </param>
    </params>
</access>
Now the appserver.xml file should look like this
<appserver ... >
    <containers>
        <container name="combined-appserver">
            <servers>
                ...
                <server name="http" ...>
                    ...
                <accesses>
                        <!-- per default deny everything -->
                        <!-- access type="allow">
                            <params>
                                <param name="X_REQUEST_URI" type="string">.*</param>
                            </params>
                        </access -->
                        <access type="allow">
                            <params>
                                <param name="X_REQUEST_URI" type="string">
                                    ^\/magento\/([^\/]+\/)?(media|skin|js|index\.php).*
                                </param>
                            </params>
                        </access>
                </accesses>
                ...
            </server>
                <server name="https" ...>
                    ...
                    <accesses>
                        <!-- per default deny everything -->
                        <!-- access type="allow">
                            <params>
                                <param name="X_REQUEST_URI" type="string">.*</param>
                            </params>
                        </access -->
                        <access type="allow">
                            <params>
                                <param name="X_REQUEST_URI" type="string">
                                    ^\/magento\/([^\/]+\/)?(media|skin|js|index\.php).*
                                </param>
                            </params>
                        </access>
                    </accesses>
                    ...
                </server>
            </servers>
        </container>
    </containers>
</appserver>
Restart the application server and open the dashboard again. The security warning should have been gone!
Adding Rewrites
Adding rewrite funtionality for your Magento installation is a very similar process as to make it secure. Add the following lines to <server name="http">...</server> and <server name="https">...</server> nodes.
<rewrites>
    <rewrite condition="-d{OR}-f{OR}-l" target="" flag="L" />
        <rewrite condition="/magento/(.*)" target="index.php/$1" flag="L" />
</rewrites>
Restart the application server and proceed to activate the Magento Rewrite functionality in the admin panel.
Virtual Host Configuration
To use a virtual host to run Magento, follow the steps below. As with any other webserver using a virtual host, first add the domain you like to use in your hosts file.
Assuming magento.dev is the domain where you want the local installation to be available, you have to do the following steps. First, open the /etc/hosts (you need admin access) with your favorite editor and add the following lines
::1 magento.dev
127.0.0.1 magento.dev
fe80::1%lo0 magento.dev
and save the file.
Then add a virtual host node to the webserver configuration that you will find in /opt/appserver/etc/appserver/conf.d/virtual-hosts.xml. Here is already an example virtual host configuration available. Add the following configuration within the <virtualHosts> node.
<virtualHost name="magento.dev">
    <params>
        <param name="documentRoot" type="string">webapps/magento</param>
    </params>
    <rewrites>
        <rewrite condition="-d{OR}-f{OR}-l" target="" flag="L" />
        <rewrite condition="(.*)" target="index.php/$1" flag="L" />
    </rewrites>
    <accesses>
        <access type="allow">
            <params>
                <param name="X_REQUEST_URI" type="string">
                    ^\/([^\/]+\/)?(media|skin|js|index\.php).*
                </param>
            </params>
        </access>
    </accesses>
</virtualHost>
After adding the virtual host restart the application server.
As Magento stores the base URL of the shop in the database, you MUST change these URLs in the database. Again, login to the MySQL command line with
$ mysql -uroot -pand execute the following SQL statements
UPDATE magento.core_config_data \
   SET value = 'https://magento.dev:9443/' \
 WHERE path = 'web/secure/base_url';

UPDATE magento.core_config_data \
   SET value = 'http://magento.dev:9080/' \
WHERE path = 'web/unsecure/base_url';
Clear the Magento cache by executing
$ sudo rm -rf /opt/appserver/webapps/magento/var/cache/*and you are all set. Start your favorite browser and open the URL http://magento.dev:9080, voilá!
Rotating Logfiles
Rotating the Magento Logfiles can also be activated by adding the following lines below the params node
<appserver ... >
    ...
    <scanners>
        <scanner
            name="logrotate-magento"
            type="AppserverIo\Appserver\Core\Scanner\LogrotateScanner">
            <params>
                <param name="interval" type="integer">1</param>
                <param name="extensionsToWatch" type="string">log</param>
                <param name="maxFiles" type="integer">10</param>
                <param name="maxSize" type="integer">1048576</param>
            </params>
            <directories>
                <directory>webapps/magento/var/log</directory>
            </directories>
         </scanner>
    </scanners>
    ...
</appserver>
Keep in mind, that the directory
webapps/magento/var/loghas to be relative from the application servers base directory. You can also add multiple<directory>nodes pointing to directories containing files to be rotated.
After restarting the application server, your Magento log files will be rotated every day, or if they reached 1 MB.
Executing Magento CRON Jobs
When you run Magento on a Debian Linux for example, you have to register the cron.sh in your systems CRON table to be executed periodically. This is, for sure, NO big deal, but it might come together with some handicaps like missing permissions for example. If you run Magento inside appserver.io, life will be less complicated, because you are able to execute the Magento CRON by a Stateless session bean.
Creating a Stateless session bean is very simple, because this is a plain PHP class with some annotations. Let us have a look at an example you can find in one of our repositories.
<?php

/**
 * AppserverIo\Apps\Magento\Cron\SessionBeans\CronSessionBean
 *
 * NOTICE OF LICENSE
 *
 * This source file is subject to the Open Software License (OSL 3.0)
 * that is available through the world-wide-web at this URL:
 * http://opensource.org/licenses/osl-3.0.php
 *
 * PHP version 5
 *
 * @author    Tim Wagner <tw@appserver.io>
 * @copyright 2015 TechDivision GmbH <info@appserver.io>
 * @license   http://opensource.org/licenses/osl-3.0.php Open Software License (OSL 3.0)
 * @link      https://github.com/appserver-io-apps/magento-cron
 * @link      http://www.appserver.io
 */

namespace AppserverIo\Apps\Magento\Cron\SessionBeans;

use AppserverIo\Psr\Application\ApplicationInterface;
use AppserverIo\Psr\EnterpriseBeans\TimerInterface;
use AppserverIo\Psr\EnterpriseBeans\TimedObjectInterface;

/**
 * A stateless session bean that invokes the magento CRON job.
 *
 * @author    Tim Wagner <tw@appserver.io>
 * @copyright 2015 TechDivision GmbH <info@appserver.io>
 * @license   http://opensource.org/licenses/osl-3.0.php Open Software License (OSL 3.0)
 * @link      https://github.com/appserver-io-apps/magento-cron
 * @link      http://www.appserver.io
 *
 * @Stateless
 */
class CronSessionBean implements TimedObjectInterface
{

    /**
     * The application instance that provides the entity manager.
     *
     * @var \AppserverIo\Psr\Application\ApplicationInterface
     * @Resource(name="ApplicationInterface")
     */
    protected $application;

    /**
     * Example method that should be invoked after constructor.
     *
     * @return void
     * @PostConstruct
     */
    public function initialize()
    {
        $this->getInitialContext()->getSystemLogger()->info(
            sprintf('%s has successfully been invoked by @PostConstruct annotation', __METHOD__)
        );
    }

    /**
     * The application instance providing the database connection.
     *
     * @return \AppserverIo\Psr\Application\ApplicationInterface The application instance
     */
    public function getApplication()
    {
        return $this->application;
    }

    /**
     * Returns the initial context instance.
     *
     * @return \AppserverIo\Appserver\Application\Interfaces\ContextInterface The initial context instance
     */
    public function getInitialContext()
    {
        return $this->getApplication()->getInitialContext();
    }

    /**
     * Invokes the Magento CRON implementation.
     *
     * @return void
     * @throws \Exception
     */
    public function invoke()
    {

        try {

            // backup the old working directory
            $oldDir = getcwd();

            // change current directory to the applications intallation directory
            chdir($this->getApplication()->getWebappPath());

            // initialize Mage
            require_once $this->getApplication()->getWebappPath() . '/app/Mage.php';

            // query whether Magento has been installed or not
            if (\Mage::isInstalled() === false) {
                throw new \Exception('Magento is not installed yet, please complete install wizard first.');
            }

            // configure Magento to run the CRON jobs
            \Mage::app('admin')->setUseSessionInUrl(false);
            \Mage::getConfig()->init()->loadEventObservers('crontab');
            \Mage::app()->addEventArea('crontab');

            // dispatch the events that executes the CRON jobs
            \Mage::dispatchEvent('always');
            \Mage::dispatchEvent('default');

            // restore the old working directory
            chdir($oldDir);

            // log a mesage that Magento CRON has been invoked successfully
            $this->getInitialContext()->getSystemLogger()->debug(
                sprintf('%s has successfully been invoked at %s', __METHOD__, date('Y-m-d H:i:s'))
            );

        } catch (Exception $e) {
            $this->getInitialContext()->getSystemLogger()->error($e->__toString());
        }
    }

    /**
     * Method invoked by the container upon timer schedule that will
     * invoke the Magento CRON handler.
     *
     * This method will be invoked every minute!
     *
     * @param TimerInterface $timer The timer instance
     *
     * @return void
     * @Schedule(dayOfMonth = EVERY, month = EVERY, year = EVERY, second = ZERO, minute = EVERY, hour = EVERY)
     */
    public function invokedByTimer(TimerInterface $timer)
    {

        // let the timer service invoke the CRON
        $this->invoke();

        // log a message that the CRON has been invoked by the timer service
        $this->getInitialContext()->getSystemLogger()->debug(
            sprintf('%s has successfully been invoked by @Schedule annotation', __METHOD__)
        );
    }

    /**
     * Invoked by the container upon timer expiration.
     *
     * @param \AppserverIo\Psr\EnterpriseBeans\TimerInterface $timer Timer whose expiration caused this notification
     *
     * @return void
     **/
    public function timeout(TimerInterface $timer)
    {
        $this->getInitialContext()->getSystemLogger()->info(
            sprintf('%s has successfully been by interface', __METHOD__)
        );
    }
}
You have the choice. Either, save the PHP code from above into your Magento application folder /opt/appserver/webapps/magento under META-INF/classes/AppserverIo/Apps/Magento/Cron/SessionBeans/CronSessionBean.php or read the installation instructions of the repository.
After restarting the application server, your Magento CRON jobs will be executed every minute.
Summary
After finishing this tutorial, you have a completely optimized Magento installation ready for production or your local development process.
Please note that by clicking "Load Comments", your browser will establish a connection with servers from Disqus.
For more information, please visit our privacy statement.